imlovephoto

บริการถ่ายภาพแต่งงาน Pre-Wedding ถ่ายภาพนอกสถานที่ ถ่ายภาพในสตูดิโอ สามารถเลือกสถานที่ได้ ถ่ายด้วยกล้องดิจิตอล และถ่ายวีดีโอภายในงาน รับถ่ายรูปรับปริญญา รูปงานสำคัญต่างๆ ถ่ายภาพเดี่ยว ครอบครัว แฟชั่น

This is default featured slide 2 title

Go to Blogger edit html and find these sentences.Now replace these sentences with your own descriptions.

This is default featured slide 3 title

Go to Blogger edit html and find these sentences.Now replace these sentences with your own descriptions.

This is default featured slide 4 title

Go to Blogger edit html and find these sentences.Now replace these sentences with your own descriptions.

This is default featured slide 5 title

Go to Blogger edit html and find these sentences.Now replace these sentences with your own descriptions.

สวัสดีครับ ยินดีรับใช้ เนื้อหา สารน่ารู้ เกี่ยวกับเทคโนโลยี

imlovezaa
รายละเอียด
บริการถ่ายภาพแต่งงาน Pre-Wedding ถ่ายภาพนอกสถานที่ ถ่ายภาพในสตูดิโอ สามารถเลือกสถานที่ได้ ถ่ายด้วยกล้องดิจิตอล และถ่ายวีดีโอภายในงาน
รับถ่ายรูปรับปริญญา รูปงานสำคัญต่างๆ ถ่ายภาพเดี่ยว ครอบครัว แฟชั่น

21/5/62

Backup + Recovery ไดร์ฟ C ด้วยโปรแกรม Acronis True Image 2018


ที่มา:Pongsid M.

13/5/62

โปรแกรมควบคุมคอมพิวเตอร์ในห้องเรียน

โปรแกรมควบคุมคอมพิวเตอร์ในห้องเรียน


บันทึกนี้ปรับปรุงล่าสุดเมื่อวันที่ 29-10-2558

เขียนครั้งแรกโดย วิภัทร ศรุติพรหม
ดูแลโดย WIBOON


  • เป็นซอฟต์แวร์ชนิดโอเพนซอร์ส มีทั้งรุ่นใช้บนวินโดวส์และลินุกซ์
  • เป็นโปรแกรมควบคุมเครื่องคอมพิวเตอร์ของผู้เรียน เหมาะสำหรับห้องปฏิบัติการคอมพิวเตอร์
  • ต้นฉบับจาก http://italc.sourceforge.net
  • คำแนะนำการใช้งาน http://italc.sf.net/wiki
  • ยังไม่ได้ทดสอบว่าใช้งานได้สูงสุดกี่เครื่อง และเงื่อนไขที่ทำได้คืออะไร
  • เวอร์ชั่น 2.0.2 ทดสอบแล้วบนวินโดวส์ 7 หรือ วินโดวส์ 8.1
    แบบ 32 bit ดาวน์โหลดได้จาก http://ftp.psu.ac.th/pub/italc/italc-2.0.2-win32-setup.exe
    แบบ 64 bit ดาวน์โหลดได้จาก http://ftp.psu.ac.th/pub/italc/italc-2.0.2-win64-setup.exe
  • เวอร์ชั่น 2.0.1 ทดสอบแล้วบน Linux Mint 17.1 คลิกเพื่ออ่าน


ตัวอย่างขั้นตอนติดตั้งบน Windows 8.1

  1. วิธีติดตั้งสำหรับเครื่องผู้สอน (เครื่องแม่) การติดตั้งต้องเป็นผู้ใช้ที่มีสิทธิระดับเดียวกับ Administrator
    ติดตั้งด้วยโปรแกรม iTALC 2.0.2
    ได้หน้าต่าง Welcome to the iTALC Setup Wizard ให้คลิกปุ่ม Next >
    ได้หน้าต่าง License Agreement ให้คลิกปุ่ม I agree
    ได้หน้าต่าง Choose Install Location ยังคงเดิมเป็น C:\Program Files\iTALC แล้วคลิกปุ่ม Next >
    ได้หน้าต่าง Choose Components ยังคงเดิมเลือกทั้ง iTALC Service และ iTALC Master แล้วคลิกปุ่ม Next >
    แล้วคลิกปุ่ม Install
    โปรแกรมจะติดตั้งไปเรื่อยๆ จนเสร็จได้หน้าต่างว่า Completing the iTALC Setup Wizard
    โปรแกรมติดตั้งจะสร้างไอคอนไว้ในหน้า Apps ชื่อ iTALC และ iTALC Management Console ของ Windows ให้ด้วย
    ยังคงเลือก Run iTALC Management Console now แล้วคลิกปุ่ม Finish

    โปรแกรมเปลี่ยนไปได้หน้าต่าง iTALC Management Console
    ช่องด้านซ้าย รายการ iTALC Server ให้เลือก Demo server Backend เป็น iTALC 1 demo server
    รายการ Paths ไม่เปลี่ยนแปลง
    ต่อไปให้เลือกหัวข้อ Authentication
    แล้วไปดูช่องด้านขวา ให้ยกเลิกไม่ติ๊ก ACL-based logon authentication
    ต่อไปคลิกปุ่ม Launch key file assistant
    ได้หน้าต่าง Create/Import iTALC access keys ให้คลิกปุ่ม Next >
    ได้หน้าต่าง Assistant mode ให้คลิกเลือกเป็น Create new access keys (master computer) แล้วคลิกปุ่ม Next >
    ได้หน้าต่าง Select user role ให้ยังคงเลือกเป็น Teacher แล้วคลิกปุ่ม Next >
    ได้หน้าต่าง Directories ให้ยังคงติ๊กหัวข้อ Export public key part (master computer) และระบุ path ที่จะวางไฟล์ที่จะนำไปใช้กับเครื่องผู้เรียน
    แล้วคลิกปุ่ม Summary ไปเลือกพื้นที่เป็น C:\ แล้วคลิกปุ่ม Next >
    ได้หน้าต่าง Key directories ไม่ต้องแก้ไขอะไรให้คงค่าเดิม แล้วคลิกปุ่ม Finish
    ตอนนี้ก็จะได้ public key เป็นแฟ้มอยู่ที่ path:\italc_public_key.key.txt
    ให้คัดลอกแฟ้ม italc_public_key.key.txt นี้เก็บไว้ เพื่อเอาไปใส่ที่เครื่องลูกข่าย
  2. วิธีติดตั้งสำหรับเครื่องผู้เรียน (เครื่องลูก) การติดตั้งต้องเป็นผู้ใช้ที่มีสิทธิระดับเดียวกับ Administrator
    เตรียม public key แฟ้ม italc_public_key.key.txt ให้พร้อม
    ติดตั้งด้วยโปรแกรม iTALC 2.0.2
    ได้หน้าต่าง Welcome to the iTALC Setup Wizard ให้คลิกปุ่ม Next >
    ได้หน้าต่าง License Agreement ให้คลิกปุ่ม I agree
    ได้หน้าต่าง Choose Install Location ยังคงเดิมเป็น C:\Program Files\iTALC แล้วคลิกปุ่ม Next >
    ได้หน้าต่าง Choose Components ให้ยกเลิกไม่ต้องติ๊ก iTALC Master แล้วคลิกปุ่ม Next >
    แล้วคลิกปุ่ม Install
    โปรแกรมจะติดตั้งไปเรื่อย ๆ จนเสร็จได้หน้าต่างว่า Completing the iTALC Setup Wizard
    ยังคงเลือก Run iTALC Management Console now แล้วคลิกปุ่ม Finish

    โปรแกรมเปลี่ยนไปได้หน้าต่าง iTALC Management Console
    ช่องด้านซ้าย รายการ General เลือก Hide tray icon
    ช่องด้านซ้าย รายการ iTALC Server ให้เลือก Demo server Backend เป็น iTALC 1 demo server
    รายการ Paths ไม่เปลี่ยนแปลง
    ต่อไปให้เลือกหัวข้อ Authentication
    แล้วไปดูช่องด้านขวา ให้ยกเลิกไม่ติ๊ก ACL-based logon authentication
    ต่อไปให้คลิกปุ่ม Launch key file assistant
    ได้หน้าต่าง Create/Import iTALC access keys ให้คลิกปุ่ม Next >
    ได้หน้าต่าง Assistant mode ให้คลิกเลือกเป็น Import public key (client computer) แล้วคลิกปุ่ม Next >
    ได้หน้าต่าง Select user role ให้ยังคงเลือกเป็น Teacher แล้วคลิกปุ่ม Next >
    ที่ช่อง please scpecify the location of the public access key to be imported.
    ให้เลือกไปยังพื้นที่ที่เก็บแฟ้ม italc_public_key.key.txt ที่เตรียมไว้ แล้วคลิกปุ่ม Next >
    ได้หน้าต่าง Summary ให้คลิกปุ่ม Finish


การตั้งค่าครั้งแรกก่อนใช้งาน (ที่เครื่องผู้สอน)
  1. ก่อนใช้งานต้องเพิ่ม classroom และเพิ่ม computer เข้าไปก่อน
    ให้ไปเปิดโปรแกรม iTALC แม่ข่าย ไปที่แถบเมนูด้านซ้าย(แนวดิ่ง) ปุ่มที่ 2 หัวข้อ Classroom-Manager
    ให้คลิกขวา Add Classroom และ Add Computer ใส่แต่เลข ip ของเครื่องลูกข่ายก็พอ

    วิธีสร้าง class room ขึ้นมา 1 ชื่อ มีขั้นตอนอย่างละเอียดดังนี้
    คลิกที่ไอคอนอันที่สองที่แถบด้านซ้าย Classroom-Manager
    คลิกขวาเลือก Add classroom
    หัวข้อ New classroom ตั้งชื่อ classroom ตามต้องการ แล้วคลิก OK
    คลิกขวาเลือก Add computer
    หัวข้อ Add computer ตั้งค่า Client settings ดังนี้
    IP/hostname: ใส่ IP ที่ถูกต้อง
    Name: ตั้งชื่อตามต้องการ
    MAC address: ใส่ในรูปแบบ xx:xx:xx:xx:xx:xx (เผื่อต้องการใช้งานเรื่อง Wake on LAN หรือ Power On)
    Classroom: เลือกชื่อ classroom ที่สร้างไว้
    Type: เลือกเป็นชนิด Student computer


การใช้งาน (ที่เครื่องผู้สอน)
  1. ถ้ายังไม่ได้เปิดโปรแกรม ให้ไปเปิดโปรแกรม iTALC
  2. การใช้งานต้องไปที่เมนูด้านบน(แนวนอน) คลิกหัวข้อ Classroom แล้วเลือก classroom ที่ต้องการควบคุมพร้อมกันทุกเครื่อง
    จะได้จอเล็กของคอมพิวเตอร์ลูกข่ายแต่ละเครื่องออกมาใช้งาน
  3. เราสามารถควบคุมเฉพาะเครื่องได้ โดยการคลิกขวาที่เครื่องที่ต้องการ แล้วเลือกคำสั่งที่ต้องการ

 ที่มา:http://opensource.cc.psu.ac.th

12/1/62

VirtualBox with phpVirtualBox (Web Based Interface)

phpVirtualBox is an open source web interface for Oracle VirtualBox, written in php with AJAX implementation. It allows you to remotely manage VirtualBox instance, really useful when you don’t have GUI in operating system. phpVirtualBox allows you control  and manage guest instance as like the VirtualBox GUI do, you wont find any difference between the web interface and VirtualBox GUI. More to that phpVirtualBox supports remote console via Oracle RDP web client that comes with Extension Pack.
Here is the small guide to setup phpVirtualBox on Ubuntu (Its supports all Linux Variants, its minimum requirement is to have the web server installed with PHP support).

Prerequisites:

Install Apache with PHP.
sudo apt-get install apache2 php5 libapache2-mod-php5

Download phpVirtualBox:

Issue the following command to download the lastest phpVirtualBox.
wget 'http://sourceforge.net/projects/phpvirtualbox/files/latest/download'
Extract it.
sudo unzip phpvirtualbox-*.zip
Move it to default document root of web server.
sudo mv phpvirtualbox-* /var/www/html/virtualbox

Configure phpVirtualBox:

We need to modify the phpVirtualBox configuration to make the successful communication with VirtualBox installation, first we need to rename sample config file (config.php-example to config.php).
sudo mv /var/www/html/virtualbox/config.php-example /var/www/html/virtualbox/config.php
Modify the config file
sudo nano /var/www/html/virtualbox/config.php
Following are the minimum configuration for phpVirtualBox. User Name / Password for the system that runs VirtualBox, in my case i am using user “raj”, because he will be configured to run vboxwebsrv service( will be set in next step).
var $username = ‘raj’;
var $password = ‘x’;
If you are running VirtualBox and php are on the same host, leave the following $location as it is.
var $location = ‘http://127.0.0.1:18083/’;

Configure vboxweb-service:

VirtualBox setup creates init script vboxweb-service when it is installed, this is used to start and stop the vboxwebserv, before starting the service, we need to have /etc/default/virtualbox file because it contains settings for the service . We need to create it manually if it does not exists.
sodo nano /etc/default/virtualbox
We must set minimum VBOXWEB_USER to run the vboxweb-service, now VirtualBox will run as “raj”;  this user and password must be entered in phpVirtualBox config file.
VBOXWEB_USER=raj
If you are running phpVirtualBox in some other host, VBOXWEB_HOST is need to be set in the same file, in this case phpVirtualBox will communicate with vboxweb-service over the network.
VBOXWEB_USER=raj

VBOXWEB_HOST=192.168.1.103
Restart the vboxweb-service.
sudo /etc/init.d/vboxweb-service restart
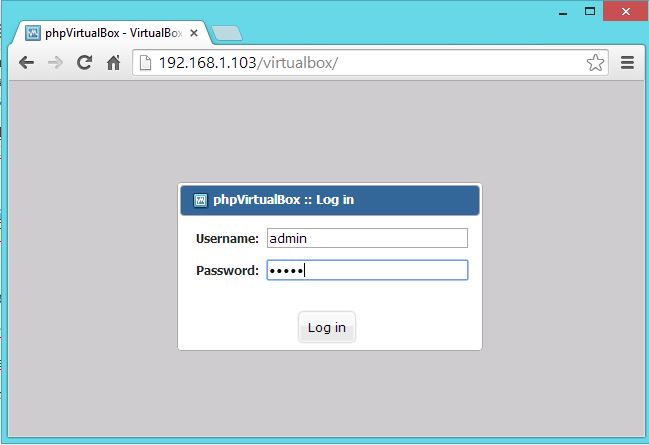
Now open a web browser and point to http://your-ip-address/virtualbox, you will be asked to login. Default login is admin /admin.
phpVirtualBox - Login Page
phpVirtualBox – Login Page
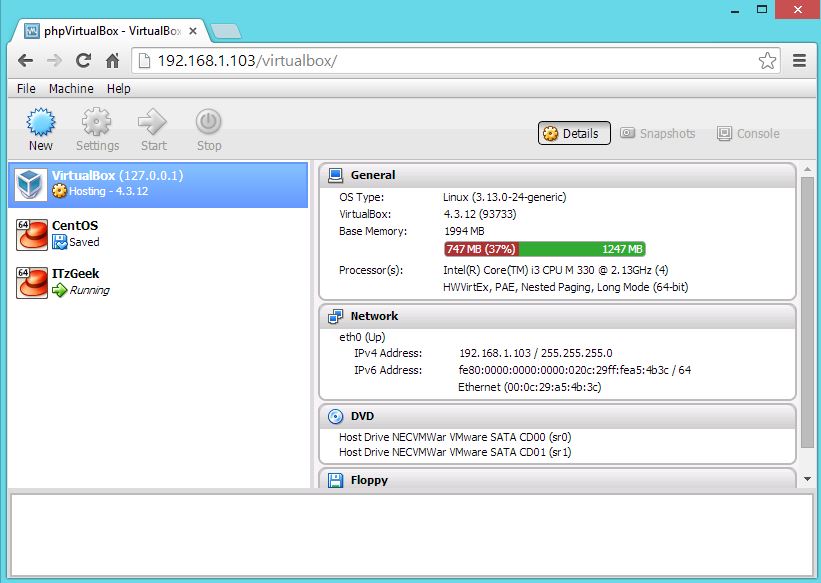
You can find the created vm’s. You can either create a new vm or work on existing vms by taking console.
phpVirtualBox - Home Page
phpVirtualBox – Home Page
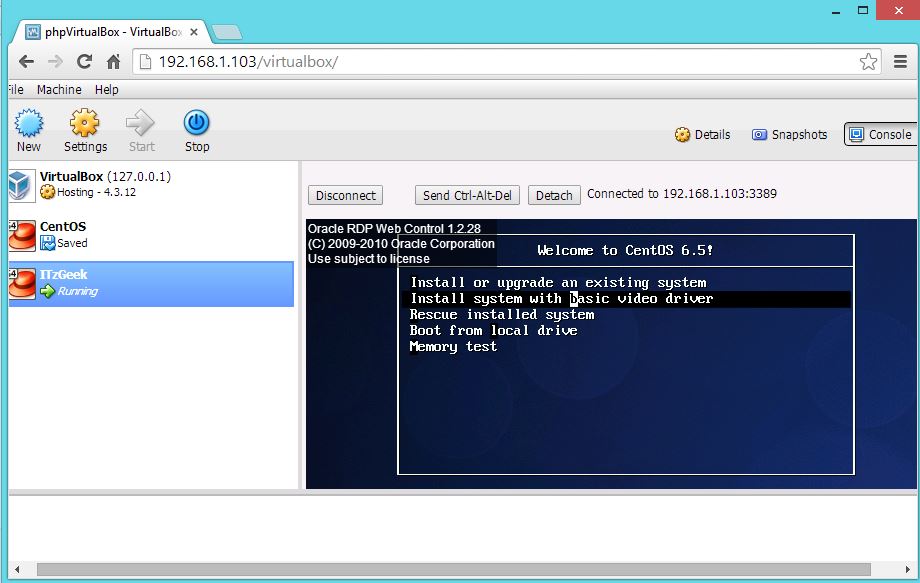
To take a remote console you must install VirtualBox Extension Pack and also you have to Enable Remote Console.
You can take console by clicking console tab in browser.
phpVirtualBox - WebRDP Console
phpVirtualBox – WebRDP Console
OR
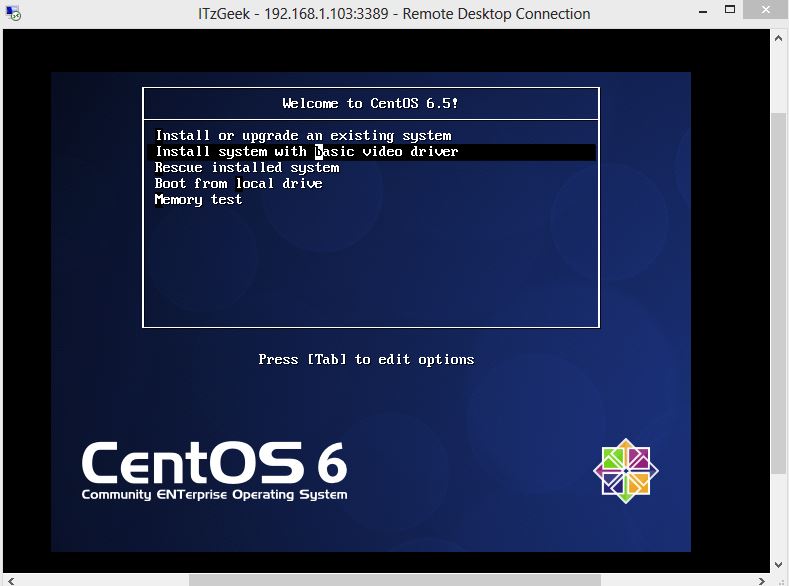
Take mstsc of host server where VirtualBox is running.
phpVirtualBox - RDP Console
phpVirtualBox – RDP Console
That’s All. We welcome your comments, please do comment in comments section.


ที่มา : https://www.itzgeek.com/how-tos/virtualization/manage-virtualbox-with-phpvirtualbox-web-based-interface.html